I was recently asked to make one of these bangles in a specific size for
Small Space.
It had certainly been a while since I'd made of these so naturally I was a little bit nervous as to whether I could still do it, whilst being 7 months pregnant no less!
The technique used to form this type of bangle is called 'anticlastic raising', which was something I experimented with during my final year at Tafe - as I said, it had been a while.
Luckily I had documented the process well so I had great notes to refer back to, and I had made at least 5 of these when I first finished studying for various orders and stockists so I had a bit of practice up my sleeve.
This time I decided to photo document the making, as I wanted to better express the process to anyone interested, and also to show just how involved it is! Here's a few snapshots of my anticlastic day in the studio...
 |
| flat sheet bangle before forming |
 |
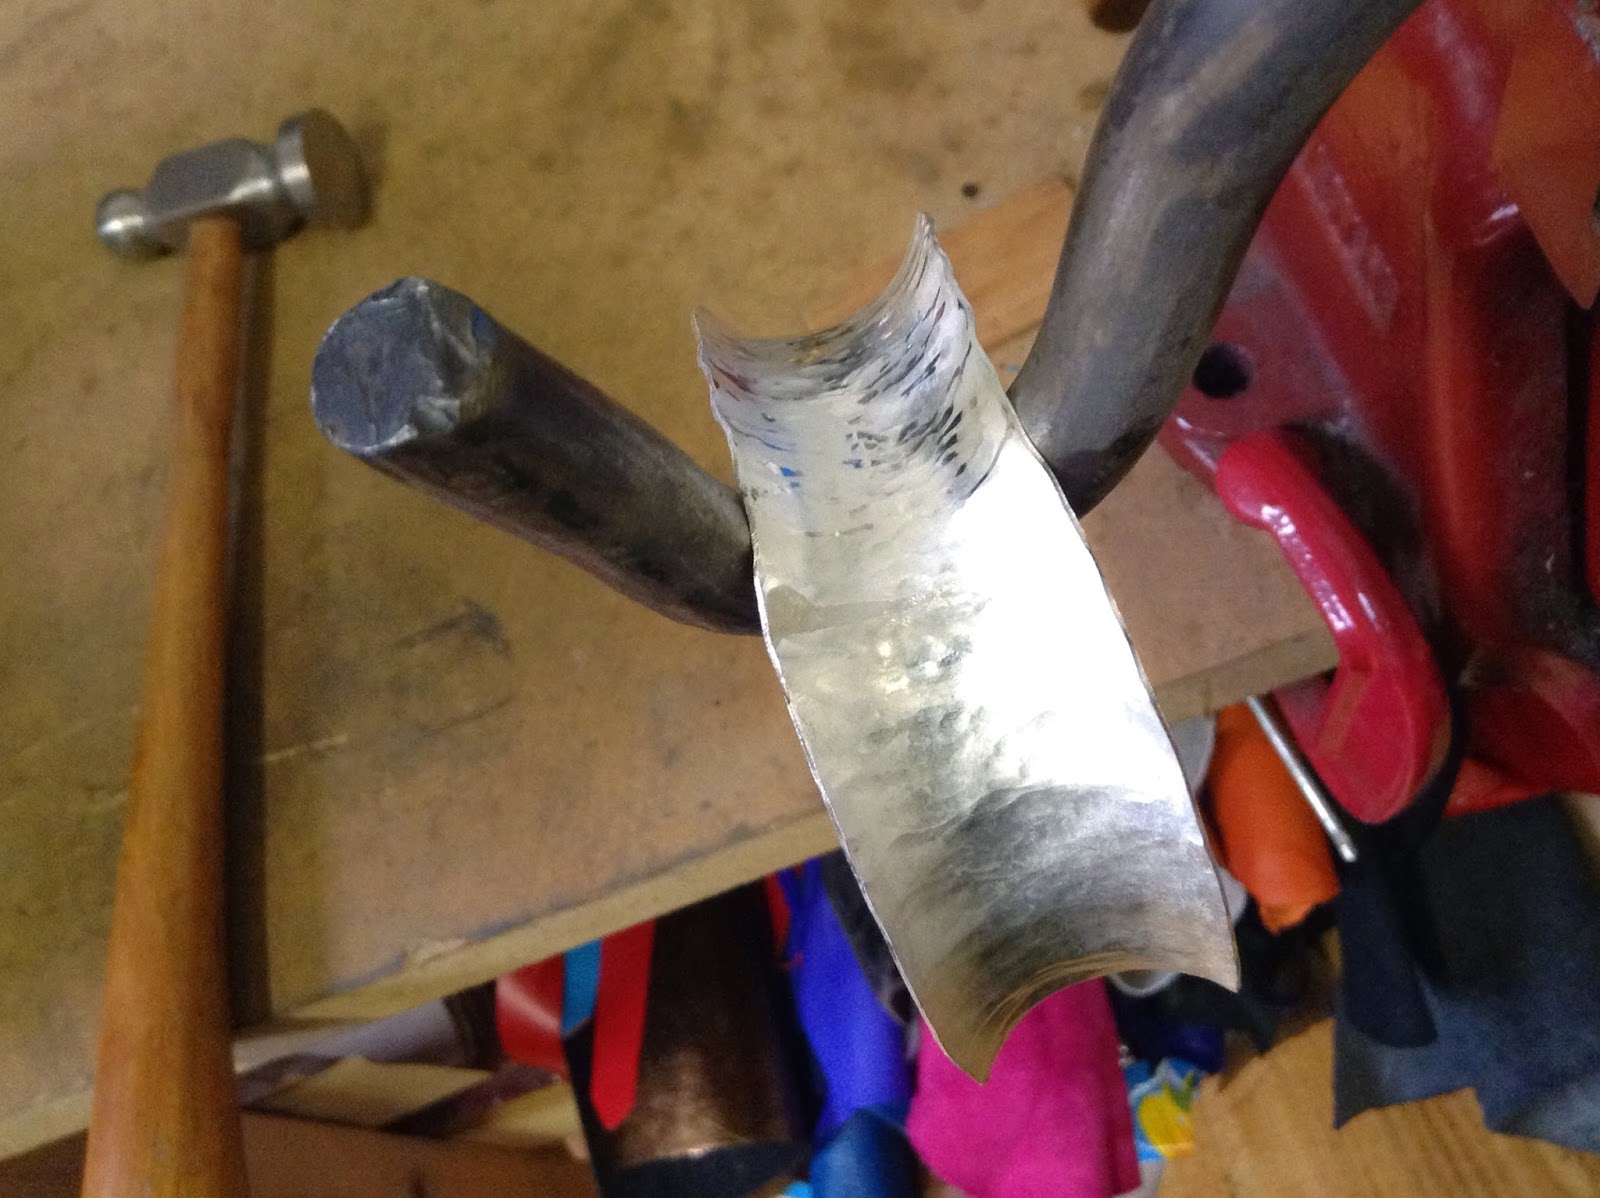
| the forming starts on a hardwood specially shaped stake |
 |
| before each annealing (of which there are so many) the piece is covered in a boric/borax/metho mixture to protect it from firescale... |
 |
| and set on fire. Flambé! |
 |
| more forming continues, starting to take shape now |
 |
| the curve is deepened now on a metal stake in at least two more stages, always annealing in between of course |
 |
| here you can see the effect of the deepening of the curve and the decreasing width of the bangle |
 |
| more annealing, always annealing |
 |
| now forming the edges further over to form a deeper curve |
 |
| flattening the egdes and working out any inconsistencies |
 |
| folding the edge right over, working from each side in equal hammer strikes |
|
|
 |
| closing the edge tight so the central gold ring can spin freely |
 |
| almost there! |
 |
| cleaning up the edges, after the ring has been soldered in. After cleanup the oxidising and polishing and then all done :) |
A rather involved process as you can see, but nice to know I can still do it after a few years!


No comments:
Post a Comment