Head on over to my brand new website where I will be continuing to post new blog entries from this day onwards!
You can now also shop online from a selected range of my ring, bracelet, earring & necklace designs.
Exciting times!

15.5.15
16.2.15
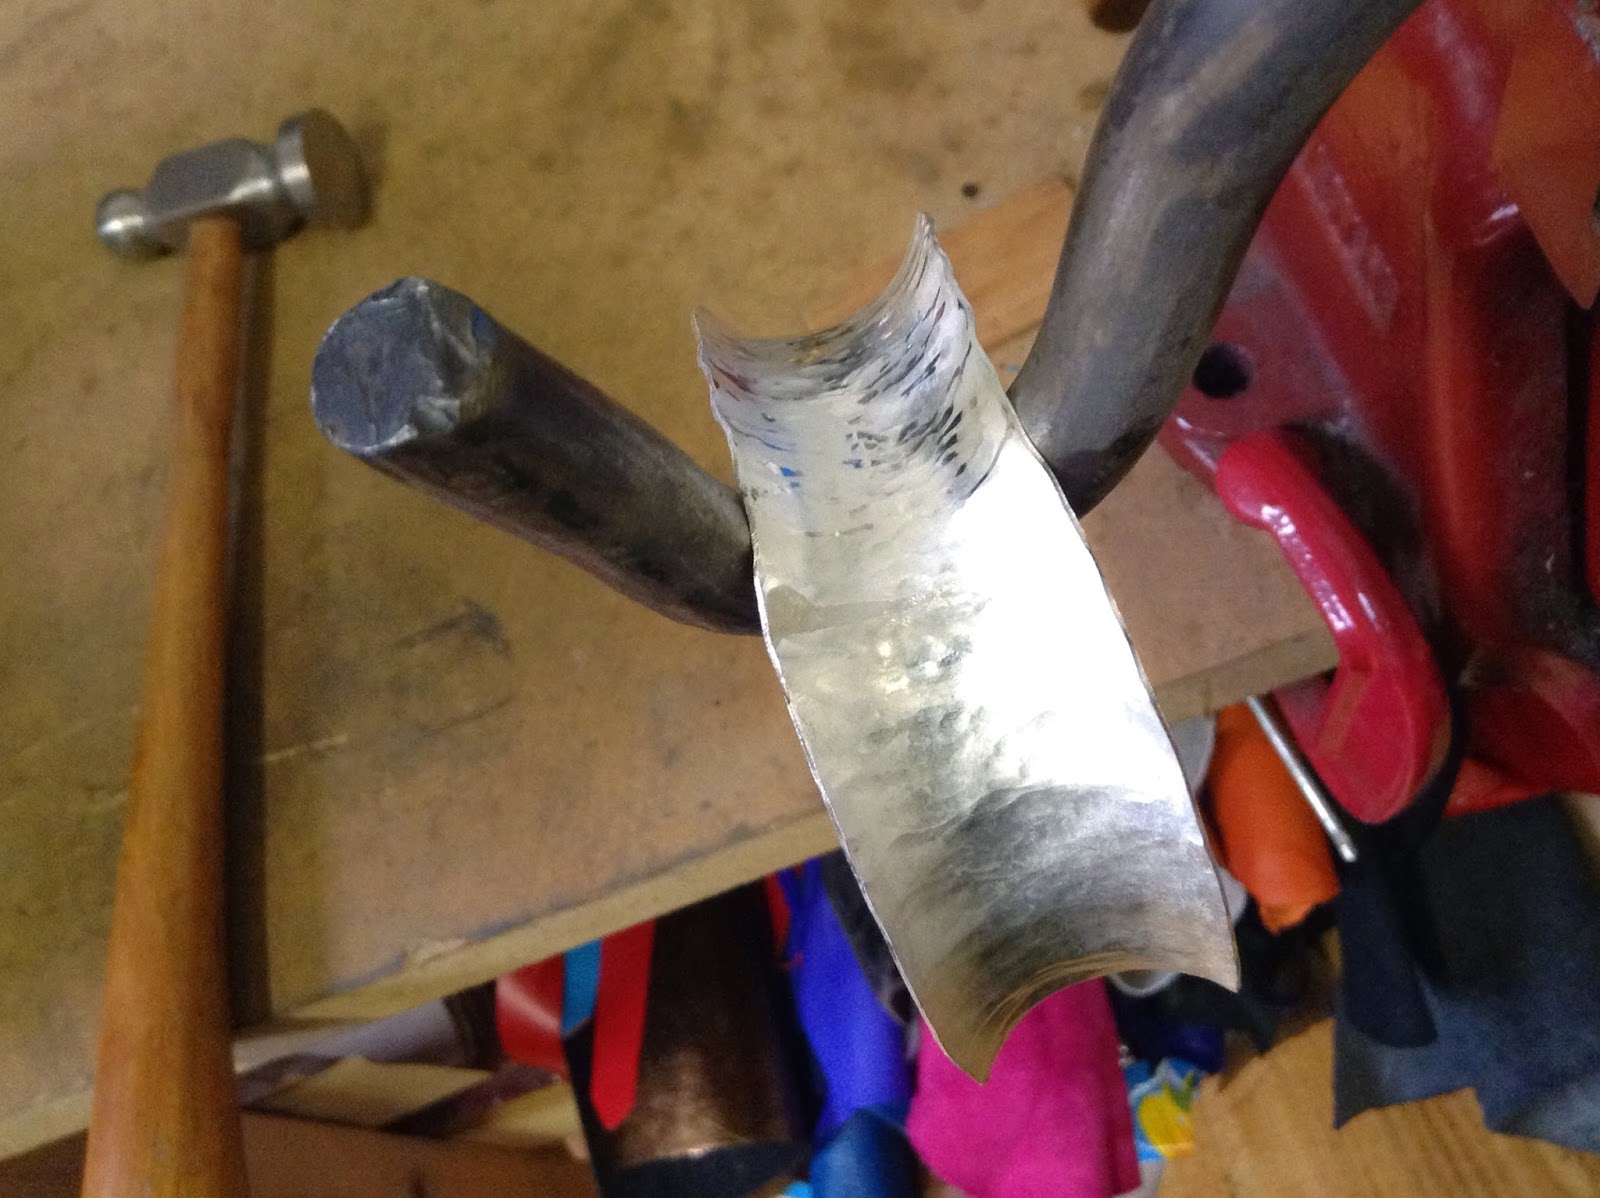
ribbon torque bangle

I've
lost count of how many of these bangles I've made since developing the
process in 2007, they just never seem to go out of fashion. But if I
had dollar for every time I've been asked how they're made...
Here the silver strip is twisted to form an old school straw shape.

The
"straw" is annealed with flame and forged over with a cross peen
hammer. This is a repeated process. Then the "straw" is untwisted to
reveal the form.

The strip is then measured and rounded up to form the bangle. The ends are riveted in place with three strong silver rivets, each one hammered into place over my trusty cobbler's shoe anvil. Then all cleaned up and polished and voilá!

4.2.15
portraits
I have finally succumbed to the idea that I needed some professional studio shots and portraits, as opposed to the random selfies I have on file and on my website (solitary worker problems).
I mustered up my courage and asked the fabulous Harriet Claire Tarbuck to capture me at work and amongst the more interesting nooks of my beautiful original industrial Collingwood studio.


Some of these will eventually be featured on my newly renovated website (currently in progress, don't worry, I'll keep you updated). But for now they are at least recorded for posterity, which is nice.
2.12.14
a mere coincidence
I've now made these earrings in both 18ct yellow gold and oxidised sterling silver. They are so incredibly comfortable and easy to wear, I have some of the gold ones and I wear them almost everyday.


Grug.
Now any self respecting Aussie from Gen X or early Gen Y will know exactly what I'm referring to. For those who can't quite remember or are indeed not from Australia, you'll be forgiven for needing this explanation:
(Excerpt from Wikipedia) Grug is a fictional character appearing in a series of Australian children's books by the author Ted Prior. They were published between 1979 and 1992.
Grug began his life as the top of a Burrawang tree that looks more like a Grass tree. Resembling a small, striped haystack with a face, he is fascinated by the world around him and solves everyday problems creatively and without fuss. When dancing instructions are too difficult to understand, Grug invents his own dance and calls it "The Grug".
Brilliant piece of Australiana right there. I think we can all use a little Grug in our lives, solving problems "creatively and without fuss".

4.11.14
long time between drinks
There are no excuses, I just simply do not have the time that I used to since my little bundle of cuteness came into my life. However I have certainly been making lot of orders and commissions over the last few months, and have been rather prolific with my Instagram feed too.
We're building up to that crazy time of year again and to kick off the present buying we're having another POP, BANG, SPARKLE Pop-up shop on November 30 for all you Melbourne peeps.

Here's a little progress of some stacking rings that I made for Arbor from one of their customer's old diamond ring and earrings:


23.6.14
I've finally discovered the fabulous-ness that is Instagram. Follow me @susan_ewington_jewellery


13.6.14
grain set granule ring
Here's a new addition to the collection at Arbor. Rubies and 18ct yellow gold, what could be better?

3.5.14
fitted wedder
Here's the latest piece to roll off my bench - the fitted wedder to an engagement ring I made last year. The emerald cut green sapphire is complimented beautifully with a princess cut parti sapphire in a light aqua-golden tone, the colours together reminiscent of the ocean. Both are set in 18ct rose gold with 18ct white gold bands.

27.3.14
finally getting back to it
Yep, it's definitely been a while. But I've got a pretty good excuse... of the new baby variety! He's been keeping me busy and away from the bench, but I'm happy to report that my longing for making (and orders I can no longer put off!) has returned and I'm slowly getting back into it when time allows.
To kick it off I've got some new beach glass pieces in great colours I've not had before!
These soft pink pieces are the more rare American Depression era type glass. During the Depression glassware was produced in the cheapest colours and given as a bonus with food purchases. Whole and not beachy pieces are now quite collectable, but this beautiful matte finish is only achievable after being tumbled around in the ocean for about 70 years!

And this UV milk glass (otherwise known as Jadeite in the glass world, but not be confused with the real gemstone of course) is just so awesome, but unfortunately I didn't have a UV bulb to show you how it glows in the dark! Luckily it looks beautiful in natural light too. These will be the first opaque pieces in my collection.

So I'm not sure when but I'll be sure to post some photos of the finished pieces!
30.12.13
old new
A Christmas make for a special recipient...
 |
| deco pendulum studs - antique steel nails, 18ct yellow and white gold |
19.12.13
wedding
This most recent wedding ring commission was for a lovely little pair of white gold and platinum rings. His was based on my previous make but done in the subtle contrast of 18ct white gold and platinum - the dark grey of the white gold sets off the brightness of the platinum so nicely. Hers was to match an existing engagement ring in 18ct white gold, but with the addition of some carved lines to gently tie in with his ring.

12.12.13
stocked up
After a few of my engagement/wedding style rings sold at Arbor over the last few months, it didn't take much for my display to look a bit understocked. So after a few new additions recently I'm glad to say that it is looking healthy once again.
Here's the final addition for the year, just in last week...
 |
| yellow sapphires in 18ct yellow gold and 9ct grey gold |
4.12.13
the night that was pop shop
A successful pop shop was had.
They came, they drank, they bought.
Special thanks to Liz for the amazing bunting and extra organising!


22.11.13
pop shop super sale!

17.11.13


1.11.13
anticlastic raising
I was recently asked to make one of these bangles in a specific size for Small Space.


It had certainly been a while since I'd made of these so naturally I was a little bit nervous as to whether I could still do it, whilst being 7 months pregnant no less!
The technique used to form this type of bangle is called 'anticlastic raising', which was something I experimented with during my final year at Tafe - as I said, it had been a while.
Luckily I had documented the process well so I had great notes to refer back to, and I had made at least 5 of these when I first finished studying for various orders and stockists so I had a bit of practice up my sleeve.
This time I decided to photo document the making, as I wanted to better express the process to anyone interested, and also to show just how involved it is! Here's a few snapshots of my anticlastic day in the studio...
 |
| flat sheet bangle before forming |
 |
| the forming starts on a hardwood specially shaped stake |
 |
| before each annealing (of which there are so many) the piece is covered in a boric/borax/metho mixture to protect it from firescale... |
 |
| and set on fire. Flambé! |
 |
| more forming continues, starting to take shape now |
 |
| the curve is deepened now on a metal stake in at least two more stages, always annealing in between of course |
 |
| here you can see the effect of the deepening of the curve and the decreasing width of the bangle |
 |
| more annealing, always annealing |
 |
| now forming the edges further over to form a deeper curve |
 |
| flattening the egdes and working out any inconsistencies |
 | ||
| folding the edge right over, working from each side in equal hammer strikes |
 |
| closing the edge tight so the central gold ring can spin freely |
 |
| almost there! |
 |
| cleaning up the edges, after the ring has been soldered in. After cleanup the oxidising and polishing and then all done :) |
A rather involved process as you can see, but nice to know I can still do it after a few years!
Subscribe to:
Posts (Atom)